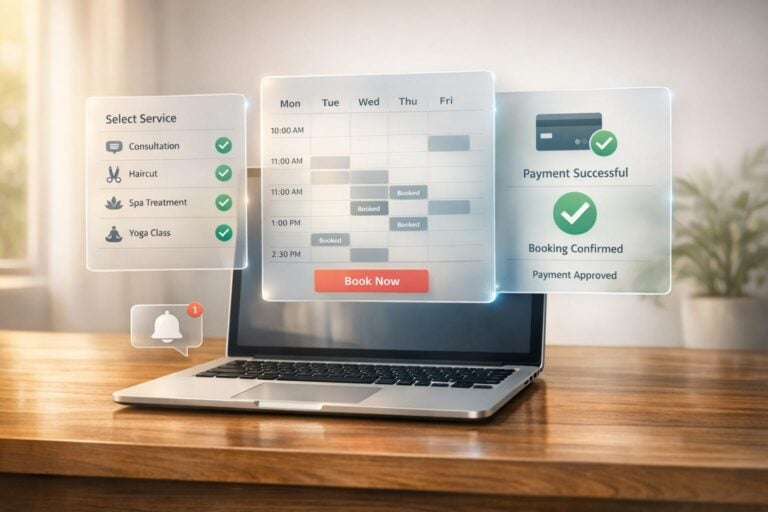
Adding online booking to your website is essential for meeting customer expectations and increasing your revenue. Over 70% of customers prefer booking online, and nearly half of all bookings happen outside regular business hours. By implementing an online system, you can save time, reduce no-shows by up to 50%, and make scheduling easier for both you and your clients. Here’s a step-by-step summary:
- Choose a Booking System: Look for features like real-time availability, mobile compatibility, secure payment processing, and calendar syncing. Ensure it integrates smoothly with your website and tools.
- Set Up the System: Add your business details, services, and staff. Enable payment options and design a user-friendly booking page that matches your site.
- Integrate with Your Website: Use embed codes, popups, or direct links to make booking accessible. Test the process on desktop and mobile devices.
- Optimize the Process: Use automated reminders, clear policies, and data insights to improve customer experience and reduce scheduling issues.
Online booking is a simple way to keep your calendar full, save time, and give your clients the convenience they expect.
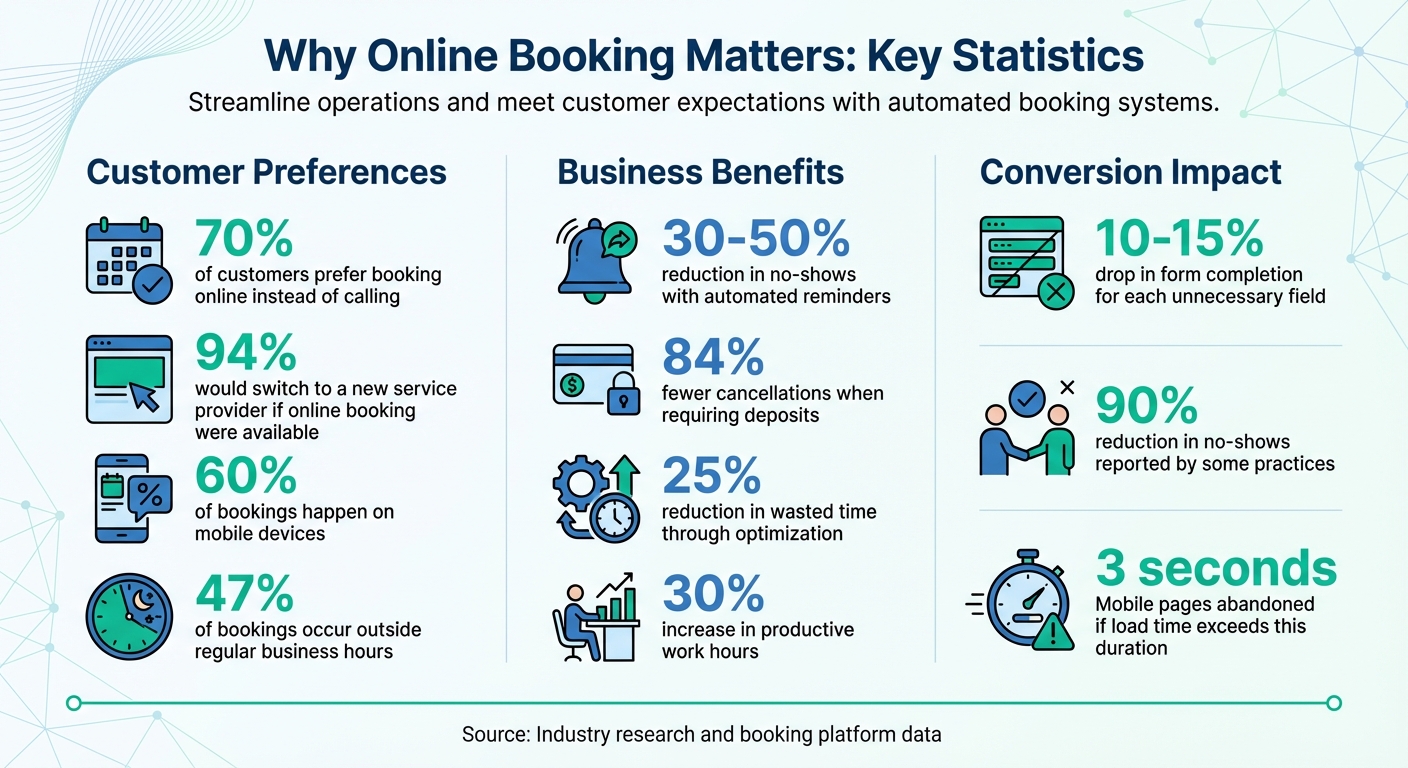
Online Booking Statistics: Customer Preferences and Business Impact
Step 1: Select an Online Booking System
Choosing the right booking system is more than just a technical decision – it directly impacts your ability to attract and retain customers. Did you know that over 70% of customers prefer booking online instead of calling? Even more compelling, 94% of people would switch to a new service provider if online booking were an option. With stats like these, it’s clear that your booking system can make or break your business. Start by identifying the features you need to keep things running smoothly.
Identify Required Features
Begin with the basics. Your booking system should offer real-time availability updates, two-way calendar syncing (think Google Calendar or Outlook), and time buffers – those extra 10–15 minutes for cleanup or jotting down notes. Make sure it supports secure payment processing through platforms like Stripe, PayPal, or Square, so you can collect deposits or full payments upfront.
Since roughly 60% of bookings happen on mobile devices, the system must work seamlessly on smartphones. Look for automated communication features, such as instant confirmations and reminder messages via email or SMS. These reminders can cut down no-shows by as much as 30–50%. Also, keep your booking forms simple and branded. Every unnecessary field can lower your form completion rate by 10–15%. Once you’ve nailed down these essentials, make sure the system integrates easily with your existing tools.
Check Integration Compatibility
Your booking system should fit effortlessly into your current setup. Whether you’re using WordPress, Wix, or Squarespace, you’ll typically have three options: iframe embeds (easy but sometimes clunky), JavaScript widgets (sleeker design), or platform-specific plugins for hassle-free integration. Beyond your website, ensure the system works with tools you already rely on, like CRM software, video conferencing platforms (Zoom or Google Meet), and marketing tools like Mailchimp.
Review Pricing and Growth Options
Pricing for booking systems varies widely. You’ll find free plans for solo users, per-user pricing that ranges from $10–$30/month for small teams, or flat-rate plans between $30–$150/month for businesses planning to grow. Flat-rate plans often provide better value as your team expands. Be on the lookout for hidden fees, such as transaction charges or costs for premium plugins.
If you’re planning to scale – adding new locations, hiring more staff, or expanding your services – choose a system that supports features like multi-location management, team scheduling, and analytics. This way, you won’t need to switch platforms as your needs evolve.
For small businesses wanting an all-in-one solution, services like UENI can create a professional, mobile-friendly website with an integrated booking system. It’s a great way to simplify online appointment management while maintaining a polished digital presence.
sbb-itb-5b82b38
Step 2: Configure Your Booking System
After choosing your booking system, it’s time to set it up. Most platforms guide you through the process step by step, making it easier to input your business details, connect payment options, and customize your booking page. Here’s how to get started.
Create Your Account and Basic Settings
Start by registering your account with essential business information like your business name, country, currency, and time zone. Setting the correct time zone ensures your booking slots adjust automatically.
Next, add your services with clear, descriptive names. For instance, instead of using internal terms like "DT60", write something like "60-Minute Deep Tissue Massage". Include the duration and price for each service. If your business has staff, add their names, contact details, and photos. A personal touch, like staff photos, helps build trust and encourages more bookings.
Set your regular working hours and remember to block off breaks or holidays. Adding 10–15 minute buffer times between appointments can help ensure smoother transitions.
Keep intake forms simple – just ask for the basics like name, email, and phone number. Overly long forms can reduce completion rates by up to 15%. Simplicity is key, especially since 40% of online bookings occur after 6 PM or on weekends when people are browsing on their phones. These initial settings lay the groundwork for a seamless booking experience.
Enable Payment Processing
Connect a payment gateway like Stripe, PayPal, or Square. Most platforms make this easy by walking you through the steps, whether it’s entering API keys or logging into your payment provider’s account.
Decide how you’ll collect payments – full payment upfront, a deposit, or payment on arrival. Keep in mind that requiring deposits can reduce cancellations by up to 84%.
Use the "sandbox" or "test" mode in your payment gateway to run fake transactions. This allows you to identify and fix any issues in the payment process without using real money. Also, enable automated receipts so customers receive instant confirmation after making a payment.
Once your payment system is ready, shift your attention to designing a visually appealing booking page.
Design Your Booking Page
Your booking page should seamlessly match your website’s style. Upload your logo, use your brand’s exact colors (via hex codes), and select fonts that align with your website’s design. Some platforms even let you customize button text – changing "Submit" to something like "Secure Your Spot" can make the experience feel more inviting.
Adjust the layout to fit your business needs. Decide whether customers should pick a service first or a staff member first, depending on what works best for your setup. Highlight standout services with labels like "Best Deal" or "New" to grab attention.
Preview your booking page on both desktop and mobile devices. Go through the booking process as if you were a customer to spot any potential issues.
"Your site is your digital storefront, and the visual impression it makes can be as important as the services you offer." – Amanda Shih-Goel, Squarespace
Lastly, make sure your booking page links to your Privacy Policy, Terms, and cancellation/refund policies. Clear policies not only build trust but also keep you legally compliant.
Step 3: Add the Booking System to Your Website
Now that your booking system is set up, it’s time to integrate it into your website. The goal? Make it easy for visitors to find and use – especially on mobile, where most bookings happen. Pick the method that fits your site’s layout and technical capabilities.
Embed a Booking Widget
Most booking platforms offer an HTML or JavaScript snippet you can grab from your dashboard and paste directly into your site’s HTML or a custom code block. Here are three common embed options:
- Inline embeds: Displays the full scheduler directly on the page.
- Popups: Opens the scheduler in a modal window when clicked.
- Floating buttons: A sticky button that stays visible as users scroll.
For inline embeds using iFrames, set the width to 100% and the height to at least 600–700 pixels to ensure the entire interface is visible without cutting off any content. Place these embeds on high-traffic pages like your homepage, service pages, or contact page. Popups and floating buttons are great for site-wide accessibility since they don’t take up permanent space.
"Sending visitors to an external booking page adds friction. Every redirect is an opportunity for them to drop off." – SchedulingKit
If your site already explains your services, use the widget’s "Hide event details" setting to avoid repeating titles or descriptions. To improve performance and follow SEO tips for small businesses, enable lazy loading for the embed code. This prevents the widget from slowing down your page load time – a crucial factor since mobile visitors will often abandon pages that take more than 3 seconds to load.
Use a Direct Booking Link
If embedding feels too technical, a direct booking link is a simple alternative. Add the link to your navigation menu, contact page, or action buttons across your site. This method works on any website platform and doesn’t require any coding skills.
Place booking links in multiple locations, such as:
- Your site header (top-right corner)
- Footer
- Blog sidebars
- Email signature
Use clear, action-driven text like "Book Now", "Schedule Your Appointment", or "Reserve a Time". To track which links or pages generate the most bookings, add UTM parameters to your URLs. And for accessibility, always include a fallback text link near any embedded widget – this ensures users with browser issues can still book.
Test on Mobile Devices
Run through the entire booking process on a smartphone. Make sure buttons and calendar dates are large enough to tap easily, and that form fields work smoothly without requiring zooming.
If you’re using an iFrame embed, watch out for double-scrolling (when both the page and the widget scroll separately). This can frustrate users. To avoid it, use an advanced resizing script to adjust the iFrame’s height automatically, or set scrolling="no" in the iFrame code. Test whether the widget height adjusts correctly as users move through the booking steps – this confirms your script is working.
Finally, check the booking flow on multiple phone sizes and browsers like Chrome and Safari to ensure everything functions seamlessly.
Step 4: Improve the Booking Process
Now that your booking system is live, it’s time to refine it for smoother operations and fewer no-shows. By introducing automation and setting clear policies, you can save time, avoid scheduling headaches, and ensure a better customer experience. Here’s how you can fine-tune your booking process.
Configure Automated Messages
Automated messages are a game-changer when it comes to keeping customers informed and reducing no-shows. Start with an instant confirmation email to reassure clients and establish trust. Then, schedule reminders – one 24–48 hours before the appointment and another 1–2 hours prior. These reminders can significantly cut down no-shows, with some healthcare practices reporting reductions as high as 90%. Use multiple channels like email, SMS, WhatsApp, or Telegram to ensure your messages reach customers effectively.
"A reassuring email confirming the appointment can go a long way to improve customer relations, increasing conversion rates as well as loyalty." – RunSensible Editorial Team
Keep your messages short and to the point. Include essential details such as the appointment’s date, time, location, and a simple call to action. Personalize these messages with automated shortcodes that can insert the customer’s name or the service they booked. After the appointment, follow up with a message to request reviews or offer rebooking incentives.
Define Booking Policies
Clear and consistent booking policies are key to avoiding misunderstandings and protecting your bottom line. Set rules for cancellations, rescheduling, and no-shows. For example, you might require cancellations to be made at least 24–48 hours in advance and charge a fee for late changes – typically $25–$75 or 50–100% of the service price. Display these policies prominently on your booking page, in confirmation emails, reminder texts, and even on an FAQ page. Including a one-tap rescheduling link in reminder messages can make it easier for clients to adjust their appointments rather than canceling.
"A policy that clients don’t see is a policy that doesn’t work." – SchedulingKit
To further reduce no-shows, consider requiring a non-refundable deposit or keeping a credit card on file. Around 84% of businesses report fewer cancellations with this approach. At the same time, allow some flexibility for emergencies or first-time offenders to maintain good customer relationships.
Once your policies are in place, use your system’s data to fine-tune them over time.
Track Booking Patterns
Data from your booking system can provide valuable insights to help you continuously improve. Look at which time slots fill up the fastest and which services are most popular to adjust staffing and marketing efforts accordingly. Identify where customers drop off during the booking process, such as at the payment stage or while filling out forms, and simplify those steps to boost completion rates.
Nearly half of online bookings (47%) happen outside regular business hours. If you notice this trend, you might consider extending your availability. Additionally, keep an eye on appointment types that frequently run over their scheduled time, and add a 5–10 minute buffer to prevent delays. Use waiting list data to fill last-minute cancellations, keeping your schedule full and revenue steady.
Optimizing your scheduling with data can reduce wasted time by 25% and increase productive work hours by 30%. Syncing your booking data with tools like your CRM ensures a unified view of customer history while cutting down on manual data entry errors.
Conclusion
By following the steps outlined, you can seamlessly add an online booking system to your website. Choose a platform that matches your needs, configure your services and availability, integrate it into your site, and elevate the experience with automated messages and clear booking policies. This approach not only simplifies operations but also helps drive revenue.
Automated reminders alone can reduce no-shows by 30% to 50%. Your team saves time, your customers appreciate the convenience, and your calendar stays consistently booked.
"Online booking drives revenue." – SchedulingKit
The data backs it up: 94% of consumers are more likely to pick a new service provider if they offer online booking. Sticking to manual scheduling could leave your business at a disadvantage, while an easy-to-use booking system helps attract and retain clients.
You don’t need to overcomplicate things – start with a basic setup, even a free plan. Test the booking process on mobile devices, and make sure "Book Now" buttons are easy to find. The effort you put in today will save you time, reduce stress, and keep customers coming back, all while allowing them to book whenever it’s convenient for them.
FAQs
Do I need to take payments to offer online booking?
Many booking platforms, like UENI, let customers schedule appointments without needing to pay upfront. This is a great option if you want to keep things simple for your clients. However, if you’d rather collect payments during the booking process, most systems offer that as a built-in feature, allowing you to charge for appointments right away.
What’s the easiest way to add booking to my website without coding?
The simplest way to add booking functionality to your website – without touching a single line of code – is by using an online booking tool with easy embedding options. Tools like Calendly or TuCalendi allow you to generate a booking widget or link. All you have to do is copy a small code snippet or URL and paste it onto your site. It’s a fast, hassle-free solution that works smoothly with your existing setup.
How do I stop no-shows with online booking?
To cut down on no-shows, consider setting up automated reminders through email or SMS. These gentle nudges can help ensure clients don’t forget their appointments. You might also want to implement a system that requires confirmation or deposits when booking. This not only secures their commitment but also discourages last-minute cancellations. Pair these strategies with clear communication and cancellation policies that offer some flexibility to keep no-shows to a minimum.